 Creating a Colorful Square Grid Creating a Colorful Square Grid
This page describes how you can easily create, in Painter, colorful grid patterns with squares or rectangles with clean edges.
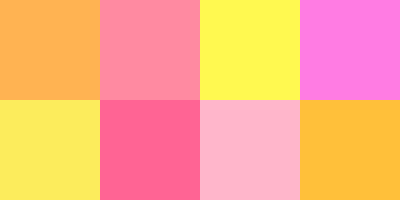
Colorful squares are nice in themselves and . . .
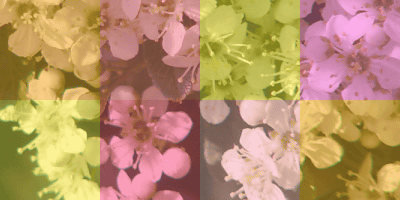
The pattern can be used as an overlay to an image. On the above example, I pasted the colorful square pattern over the photo, changed its composite method to Gel Cover, and turned down its opacity to 60%.
 Using the Grid Paper Effect Using the Grid Paper Effect
Did I make careful selections, or use shapes, to create the above pattern? No, it's much easier. And you get to use one of Painter's effects you don't use that much: Grid Paper.
- Open a new image of the pattern size you need.
- From the menu, choose Effects > Esoterica > Grid Paper.
- In the Grid Options dialog, choose the Grid type "Rectangular Grid."
- In the dialog's Color section, set the Grid Colr to Black, and Background color to White (default).
- In the Dimensions section, input the size of the squares or rectangles you want to create.
- Set Line Thickness to 1 pixel (important).
- Hit "OK."
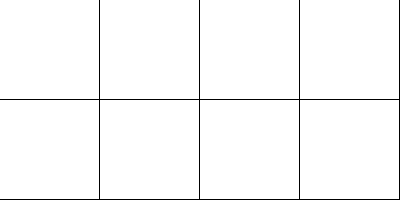
This is the grid Painter creates when I set the grid size to 100 x 100 pixels.
This might look too elementary, but go ahead and fill the squares with the colors of your choice. We will eliminate the black lines later.
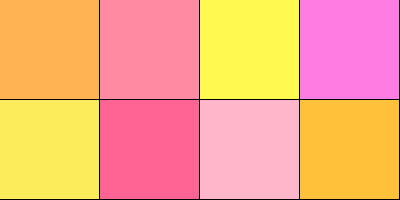
To make the fills,
- Choose the Paint Bucket tool.
- Set Tolerance and Feather to 0, and also turn off Anti-Alias (very important).

Your Property Bar should look like this.
 Getting Rid of the Black Grid Getting Rid of the Black Grid
- On the canvas, Select All, and create a layer that is the canvas's duplicate. I usually Alt + Click with the Layer Adjuster tool, but you can also copy the selection and "Paste in Place" (Shift + Ctrl + V).
On the Mac, you Option + Click with the Layer Adjuster to duplicate layer or selection, and press Shift + Command + V to "Paste in Place."
- Turn off the visibility of the canvas. This is necessary to see the modifications you make to the new layer.
- Switch to the Magnifier tool, and set maginification to 400% or more.
- Make sure that the new layer is chosen, and choose from the menu, Select > Color Select.
- In the Color Select dialog, set all of the sliders to extreme left, and click in the image on the black glid to set black as the selected color. This slider setting ensures that only pure black will be selected and there will be no feathering to the selection.
- Click "OK," and then hit Backspace (Delete for Mac) to clear the pixels inside the selection. The black grid is deleted.
- Make two duplicates of this layer. Now you have three layers over the canvas.
- Turn on the visibility of the canvas. Now the black grid is back.
- Switch to the Layer Adjuster tool, click on each layer, and nudge each of them one pixel to these directions (After clicking, use the cursor keys to nudge):
- Layer 1: 1 pixel down — hides horizontal grid.
- Layer 2: 1 pixel right — hides vertical grid.
- Layer 3: 1 pixel down and 1 pixel right — hides the remaining 1 pixel dot.
 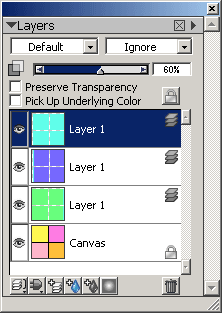
The three nudged layers completely hide the black grid as you can see in the above demonstration (The layers' colors have been changed to make the overlapping areas visible). Clone the image or drop all layers to get a flattened copy, which is what is shown at the top of this page.
 Using HTML Using HTML
There is another, totally different approach which can be used together with any graphic application — Writing a table in HTML, displaying it on a web browser, and making a screen capture. Here is an example:
<html>
<body>
<table border="0" cellspacing="0" cellpadding="0">
<tr height="100">
<td width="100" bgcolor="#ffb352"> </td>
<td width="100" bgcolor="#ff8aa1"> </td>
<td width="100" bgcolor="#fff950"> </td>
<td width="100" bgcolor="#ff7ce3"> </td>
</tr>
<tr height="100">
<td bgcolor="#fcec5c"> </td>
<td bgcolor="#ff6494"> </td>
<td bgcolor="#ffb6cb"> </td>
<td bgcolor="#ffc03a"> </td>
</tr>
</table>
</body>
</html>
You can copy and paste the above HTML code into a new file on a text editor, save the file, and see it on your browser to check how it looks.
The problem is that it is rather tiresome to type all this (though it's much easier if you use an HTML editor), and get the exact colors you want by writing them in hexadecimal.
It would be more useful to write a simple checkerboard pattern, like this:
<html>
<body>
<table border="0" cellspacing="0" cellpadding="0">
<tr height="100">
<td width="100" bgcolor="orange"> </td>
<td width="100" bgcolor="gray"> </td>
<td width="100" bgcolor="orange"> </td>
<td width="100" bgcolor="gray"> </td>
</tr>
<tr height="100">
<td bgcolor="gray"> </td>
<td bgcolor="orange"> </td>
<td bgcolor="gray"> </td>
<td bgcolor="orange"> </td>
</tr>
</table>
</body>
</html>
Which is translated by the web browser into this:

And capture the screen and fill each square with the color of your choice. To make a clean fill, do not forget to set the Paint Bucket's tolerance and feathering to 0 and turn off Anti-Alias, as shown above.
The advantage of this approach is that you can give a different size to each of the rows and columns of the squares.
(Last Modified: 2004/09/18)
|